5 new WhatsApp features that will be released in 2019

5 new WhatsApp features that will be released in 2019

The highly popular communication application purchased by Facebok in 2014 today counts 2 billion active users per month. WhatsApp is definitely one of the most used today.

[td_block_ad_box spot_id=”custom_ad_2″]

Provides text, audio and video calling, as well as sending of diverse images and content.

During 2019, the application will be equipped with some wonderful functions. Some of them are like “WhatsApp Dark Mode” and new “Sticker”. These are the five new WhatsApp functions that will be released in 2019.

> Check Out: How to Download Stickers in WhatsApp

1. Lock through fingerprint scanners

There has been speculation about a fingerprint scanner application system. Each time you try to open the application and view the messages on the screen, you will be asked to place your fingertip. This feature can be disabled manually.

2. WhatsApp Dark Mode

This feature will be very useful during late night talk with your friends and family. Automatically identifies when turning off the lights and passing the darker interface. Most of this feature benefit your eyes.

3. Fantastic sticker

Users will be able to search for the latest stickers from the search panel. Also look for stickers even when writing messages.

> Check Out: Sticker Studio: Now you can convert any photo to sticker for WhatsApp.

4. Constant audio messages

This fantastic feature is useful for those who often communicate with audio. Automatically will play the next audio message after the existent has finished. So why not press the other audio message after finishing the first.

5. Displaying videos to notifications

This feature shows a brief glimpse of a video that may have been sent directly from the notification panel. The current versions of WhatsApp present only images and GIFs in the Notifications panel. The feature also applies to YouTube videos. You can also play videos directly from the WhatsApp app without going to the YouTube app.

> Read Next: The two fastest browsers in the world,Android and iOS!

Hope you found this article useful.Please feel free to let us know your thoughts in the comment section below,follow us on twitter and facebook for more news and updates.

neOadviser

[td_block_11 category_id=”3″ limit=”1″ td_filter_default_txt=”” tdc_css=””][td_block_ad_box spot_id=”custom_ad_3″ tdc_css=””]
The two fastest browsers in the world,Android and iOS!

The two fastest browsers in the world,Android and iOS!

If we ask ourselves what are the two main problems that slow down user experience in using the internet through smartphones, the answer is: slow internet and slow smartphone.

[td_block_ad_box spot_id=”custom_ad_2″ tdc_css=””]

What many users do not know, or rather do not take into account, is the fact that there are several other factors that can significantly improve web surfing through smartphones.

The third major factor is the browser type app that is used. Google Chrome and Safari are already heavily loaded and constantly updated by parent companies who think that all users have a super-smartphone over $1,000 or a 4G + super fast network. Not only that, but these browsers do not block publicity, adds, or pop-ups that are “boring”.

> Check OutHow to Calibrate Mobile Phone Battery – That’s why it Needs Calibration

The two fastest browsers in the world,Android and iOS!

In this article we will show you how to significantly improve the quality of Internet browsing, without publicity and Adds idle, but increasing speed and protection sensibly.

This is achieved through the use of two world-numbered browsers currently for Android and iOS:

  • KIWI BROWSER – Fast & Quite (Android) 

  • BRAVE BROWSER – Secure, Fast & Private (iOS)

There are two browsers based on the Chromium concept (just like Google Chrome), but are much better than Chrome. These browsers exist for Android and iOS, respectively, and have excellent features from which most users will be delighted.

Kiwi Browser - Fast & Quiet
Developer: Geometry OU
Price: Free
  • Kiwi Browser - Fast & Quiet Screenshot
  • Kiwi Browser - Fast & Quiet Screenshot
  • Kiwi Browser - Fast & Quiet Screenshot
  • Kiwi Browser - Fast & Quiet Screenshot
  • Kiwi Browser - Fast & Quiet Screenshot
  • Kiwi Browser - Fast & Quiet Screenshot
  • Kiwi Browser - Fast & Quiet Screenshot
  • Kiwi Browser - Fast & Quiet Screenshot
  • Kiwi Browser - Fast & Quiet Screenshot
  • Kiwi Browser - Fast & Quiet Screenshot
  • Kiwi Browser - Fast & Quiet Screenshot

Two of the most important features are “Ad-Block” and the encryption of personal data that is protected by the “crypto-currency” attack. This is one aspect that we will have to begin to deepen in future articles. So-called “crypto-coin mines” on Android devices. At the moment, it’s enough to answer the question, why would someone try to attack the data of a phone with the crypto-coins?

> Check outHow to Download Stickers in WhatsApp

Very simple, these attacks allow theft of personal data and the threat to the owner that this data will be disclosed unless a crypto-currency payment is made.

These browsers are meant to completely block these actions. But this is not even the most compelling reason to use the Kiwi and Brave browser. There are a number of other features that you will also be happy to use. They will be necessary to significantly improve the aspect of Internet navigation, such as:

  • Pop-up Blockers
  • Automatic acceptance of the GDPR (privacy rules)
  • Notification blockers
  • YouTube works in the background!
  • Maintain Vimeo history
  • The latest features of Chrome Canary
  • Additive Publicity Blocker
  • Crypto-coin mining blockers.
  • Night Mode (Dark Mode)
  • Stop AMP options
  • Preserving the screen and navigating in the hidden mode
  • Delete history after 30 days of use

Download Kiwi browser and Brave browser respectively on Google Play and App Store. Trust us, you will be super satisfied with these two browsers!

> Read NextHow To Protect Your Eyes From Your Mobile – (5 Tips)

Hope you found this article useful.Please feel free to let us know your thoughts in the comment section below,follow us on twitter and facebook for more news and updates.

neOadviser

[td_block_11 category_id=”3″ limit=”1″ td_filter_default_txt=”” tdc_css=””][td_block_ad_box spot_id=”custom_ad_3″ tdc_css=””]
How To Protect Your Eyes From Your Mobile - (5 Tips)

How To Protect Your Eyes From Your Mobile – (5 Tips)

How many times have we heard the phrase “Long-term use of the phone puts a glance at risk.” Many different studies have confirmed that massive use of smartphones to control “e-mail” long time using social networks, web sites, games etc hurt the look. With this article we will try to explain how to protect your eyes from your mobile.

[td_block_ad_box spot_id=”custom_ad_2″ tdc_css=””]

How To Protect Your Eyes From Your Mobile – (5 Tips)

Often the screens are small (although recently we always look at mobile phones above 4.9 inches) and not always clean. For this reason, the American Academy of Optometry has devised a kind of guide to save people’s eyes from the “consumer style” of the device and various errors.

> Check OutGUIDE 2019: How to know when the battery of the phone needs to be replaced

Tip #1. The first thing to do is keep the phone screen clean to avoid eye fatigue and try not to expose it to sunlight.

Tip #2. Keep your phone light depending on the light. Many phones, not to say all, now have the option of lighting based on the light. This helps a lot in order to have the right lighting during 24 hours.

Tip #3. Have careful over the distance. According to the American Academy of Optometry, this distance is equal to the length of your extended arm. How do you think it is true? Do you respect this?

Tip #4. Unplug your view from time to time from your device.

Tip #5. Put a protective glass to prevent eye damage.

> Read NextWHATSAPP: How to read someone else’s messages

That’s all about How To Protect Your Eyes From Your Mobile.Hope you found this article useful.Please feel free to share your thoughts in the comment section below,follow us on twitter and facebook for more news and updates.

neOadviser

[td_block_11 category_id=”3″ limit=”1″ td_filter_default_txt=”” tdc_css=””][td_block_ad_box spot_id=”custom_ad_3″ tdc_css=””]
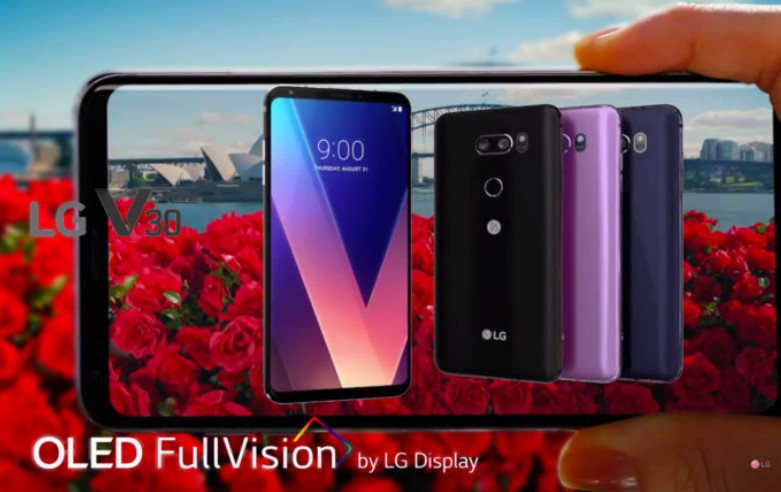
FullVision OLED Display (LG) Vs. Super AMOLED display (Samsung)

FullVision OLED Display (LG) Vs. Super AMOLED display (Samsung)

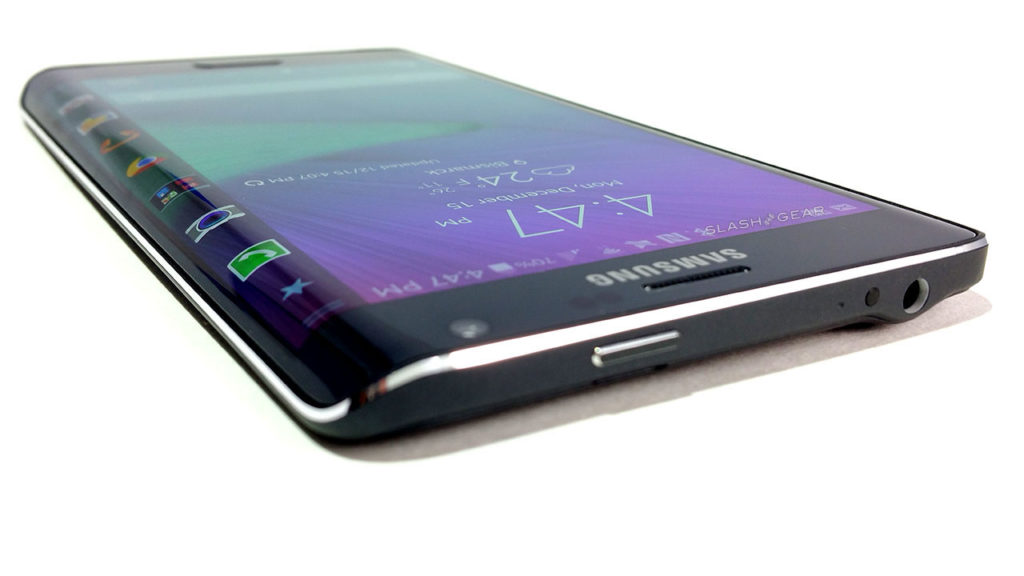
LG‘s claim is that FullVision OLED will be a “punch” right in the “chin” of Samsung. The company Samsung is maintained as the world’s most beautiful and performing screen maker and user: Super AMOLED.

[td_block_ad_box spot_id=”custom_ad_2″]

All this dynamic raises an important question for those who will have to choose between LGV30 and Samsung Note 9 (or S9 and S9 +):

From the technical/scientific point of view, what are the main changes from the FullVision OLED Display with Super AMOLED Screen?

The first fact that most users do not know is that Super AMOLED technology is the only name for a specific implementation of OLED technology. In fact the letters “AM” before the OLED script, refer to the term “Active Matrix“.

> Check Out(2019) iOS vs. Android, which is the best system?

Active Matrix means that each pixel is activated individually when the screen becomes “refresh“. So the pixels do not activate with the group as it did with the primitive “Passive Matrix” screen. The individual pixel activation turns the screen into much more powerful and efficient in energy consumption.

You can sometimes read LG’s smartphone screens and the P-OLED term (POLED), though LG does not prefer to use it often. This term stands for “Plastic OLED“, and refers to a substance with which the screen is built. Both LG and Samsung use this plastic material for their screens. It is a OLED plastic that enables curved screens and edge to edge.

So since Super AMOLED and FullView OLED technology are almost the same, why does LG not call its Super AMOLED screens?⁉ The main reason lies in marketing. Samsung calls all its Super AMOLED screens. While LG was a strong competitor, LG could not call it the same way as it was a copy. Additionally, consumers would read the term AMOLED and would connect it immediately with Samsung and not with LG.

Of course the V30 and Note 9 screens are not exactly the same. They differ in important components such as RGB panels, lighting and contrasts. In this respect we will have the opportunity to look into the details of the LG V30 victory.

We’re listening the major changes to Super AMOLED from the FullVision OLED screen:

  • FullVision OLED is slimmer, lighter and more flexible than the Super AMOLED panel
  • Super AMOLED can be used in many dispositive sizes
  • FullVision OLED is made lighter for medium and large size screens
  • Super AMOLED has a slightly cheaper production price
  • FullVision OLED has a wider viewing angle, around 170°
  • Super AMOLED gives more sharp contrasts to the black color, which is the most beautiful
  • FullVision OLED gives more sharp contrasts in glowing colors, while black is a bit pale

> Read Next: Surface Go vs. iPad

That’s all! Thanks for reading.Hope you find this post useful.Let us know your thoughts in the comment section below,follow us on twitter and facebook for more news and updates.

neOadviser

[td_block_11 category_id=”3″ limit=”1″ td_filter_default_txt=”” tdc_css=””][td_block_ad_box spot_id=”custom_ad_3″ tdc_css=””]
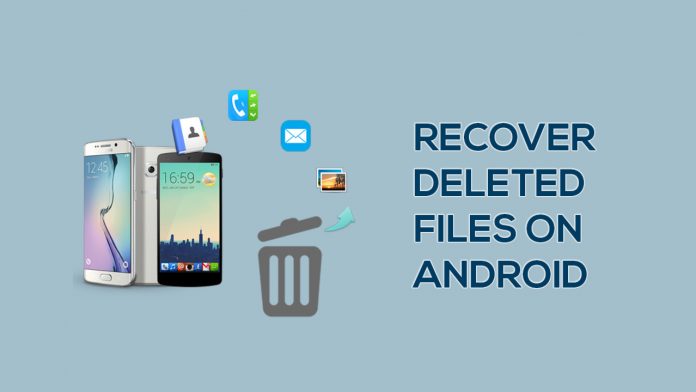
Recover Deleted Files on Android

How To Recover Deleted Files on Android Internal and SD CARD

Well, in times past when a scenario such as this occurs, you had no choice but to move on and accept the loss. Thanks to the advancement in mobile technology, we can now recover deleted files on android phones. It is so easy, anyone can carry out the process and recover deleted files without breaking a sweat. This article shifts attention to a tool that will allow you to recover deleted files on android (the internal memory as well as its SD card). So let’s get started.

[td_block_ad_box spot_id=”custom_ad_2″]

> Check Out: Steps to Hide Files and Folders on Android Without Third Party App

How To Recover Deleted Files on Android Internal and SD CARD

This article shifts attention to a tool that will allow you to recover deleted files on android (the internal memory as well as its SD card). So let’s get started.

The tool on focus here is the FORecovery Android Data Recovery tool. It possesses the capacity to allow you to recover lost files on both the internal and SD memory of your Android smartphone. All you need to do is to follow the simple steps highlighted below and you would be fine.

Steps to Recover lost files from Android’s Internal memory

1. Synchronize your Android Phone with your PC

To begin this first step, you must have the FORecovery Android Data Recovery tool installed on your PC. Once this is done, run the toolkit and then connect your Android smartphone to your PC using a USB cable. Select the data recovery option and proceed to the next step. If you encounter any difficulty, make sure that your android phone is not locked and USB debugging is enabled.

2. Select the type of file you want to recover

This step saves you the stress of recovering every type of file since the toolkit recovers all types of files by default. All you need to do here is to identify the exact type of file that you want to be recovered and then click the “next” button. This makes sure that the recovery process is short and also effective.

3. Select Advanced or Standard Scan

Your choice of scanning technique here depends on the type file that you want to recover. Standard scanning will carry out the task faster, but may sometimes not give you the results that you desire. An advanced search, on the other hand, may take more time but should give you a higher chance of success. When you are through selecting the scanning technique that you want, proceed by clicking “start”. This commences the recovery process while you wait.

4. Recover your File!

Once the scanning is done, the recovered data are displayed and you can get a better view through the preview catalog. Once you have found your lost file, click “recover” and it will get saved on your PC. You can transfer it back to your android phone whenever you please.

Steps To RECOVER DELETED FILES FROM SD CARD

The series of steps highlighted below are vital to recovering lost data on SD cards.

  1. Launch your toolkit and select the Data recovery option. Click on SD card recovery at the bottom section of the program
  2. Connect your SD card to your PC through a card reader or your smartphone through a USB cable.
  3. Select the SD card icon that appears and click continue as soon as the SD card is detected.
  4. Select the scanning technique; standard or advanced depending on your preference. Click next to proceed.
  5. Once scanning is done, select a category and view its contents. This will allow you to select the files to be recovered and then you are safe to click “Recover” in order to save them.

source (1,)

> Read Next: How To Export WhatsApp Chat as PDF using WPS Office

Remember, as long as your smartphone operates the Android operating system, this toolkit will help you recover lost data from it. Enjoy your recovered files! Let us know your thoughts in the comments section below, follow us on twitter and facebook for more news and updates.

neoAdviser

[td_block_11 category_id=”3″ limit=”1″ td_filter_default_txt=””][td_block_ad_box spot_id=”custom_ad_3″]
galaxy-s8-ok-google-not-working

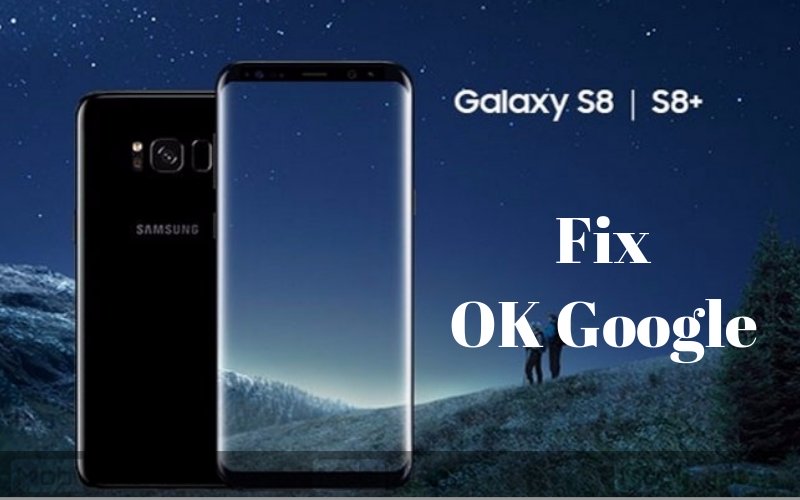
HOW TO FIX: “Ok Google” Not Working on Galaxy S8 and S8+

Unable to use voice command function on Google Assistant? Well, you are reading the right tutorial. In this guide, we will show you several ways to fix the “Ok Google” on your Samsung Galaxy S8 or S8+. Just follow the steps and the problem will be gone. Let’s start with a brief

HOW TO FIX: “Ok Google” Not Working on Galaxy S8 and S8+

> RelatedSteps to Hide Files and Folders on Android Without Third Party App

[td_block_ad_box spot_id=”custom_ad_2″]

Ok Google Not Working on Galaxy S8 & S8+

Samsung’s latest S series devices, S8 & S8+ are beautifully designed and wonderful smartphones. Their S series has always attracted the smartphone users in every corner of the world, and with S8 & S8+, their form continues. With the latest Android Nougat operating system, these devices have received very good reviews from critics. Both these devices belong to the premium segment. Meaning, they flaunt better RAM, internal memory, display size and many more features than almost every other smartphone in the market. And, they are pretty costly too.

Users paid a lot of money to get the best in the market. And if you are unable to use some feature, which even a budget smartphone user can use, then your frustration is valid. Many users have complained that Ok Google is not working properly on S8 and S8+. There are similar issues with Note 8 as well. They are unable to use voice command function, which is actually one of the main features of Ok Google. We researched the issue and came up with a list of solutions. There are many things that can affect Ok Google. Go through the solutions mentioned below and fix the issue on your devices.

Fix Ok Google on Galaxy S8 & S8+

If your voice command feature is not working, then microphone could be the issue. Or maybe the app itself is not working properly. Or your phone is causing this problem. Doesn’t matter what the reason is, go through these solutions and it will fix OK Google on Galaxy S8.

1. Disable Accessibility Services Apps

Most likely, the reason could be the accessibility apps running in the background, such as AppLock, 360 Security, KingRoot etc. Disable them and check if it solves the issue. Here’s how to do it.

Step 1. Go to Settings and open Accessibility.

Step 2. Under Services, you will find the apps. Tap on their names and switch them off.

If still Ok Google won’t work on your Galaxy S8, check out the next solution.

2. Update Google Application

Many applications crash and behave in an abrupt way when they haven’t been updated for a while. This could be the reason for your problem here too. You will need to update the app. Follow these steps to update Google app.

Step 1. Open Play Store.

Step 2. Tap on the three horizontal lines on the left top corner. Select ‘My apps and games’ from it.

Step 3. Find Google from the list of installed apps. If a new version of the app is available, tap Update located in front of it. This will update the app.

In most of the cases, updating Google app should fix the any possible errors with Google OK. But if you are still facing the trouble, check out the third solution.

> RelatedDownload Paid Apps For Free On Android (How To) – 2018

3. Use English (US) Language

The Google Assistant’s voice search only supports English (US) language. You need to check and make sure your smartphone is using the same language. Follow these steps check and correct the language to English (US).

Step 1. Go to Settings and open Language and Input.

Step 2. The first option at the top will be to select language. Select English (United States)if it is not already selected.

4. Fix Galaxy S8’s Microphone

Our smartphones’ microphone attracts a lot of dust. And it usually settles over the mic grill. Though you might not be facing problems during calls, this could still be the reason to no voice commands. To check if your microphone is giving trouble to Google app, open Google Assistant. Now, say “Ok Google”. When you say the words, the microphone icon at the bottom should look bold. If those are not bold and only dotted lines, then the microphone on Galaxy S8 indeed causing problems. You need to clean it using a pin. But be careful as not to damage the mic grill.

5. Update Language Pack

We corrected the Language in the method 3, but it is of no use if it’s outdated. You have to keep your phone’s language up-to-date, otherwise Ok Google will not work properly. Follow these simple steps to update the language pack on your Galaxy S8 and Galaxy S8+.

Step 1. Go to Settings and open Language and input.

Step 2. Open Google Voice Typing.

Step 3. Open Offline Speech Recognition.

Step 4. Under Installed tab, you will see the language English (US). If there is an update available, tap on update.

6. Remove Google App from Optimized Apps

Android 6.0+ Operating systems have Battery Optimization feature. Its use is to save battery, by restricting the background apps usage and their data usage. If Ok Google on your device is under Battery Optimization, then it will surely have trouble functioning properly. You need to check and remove the Google app from battery optimization. Follow these steps to do so.

Step 1. Go to Settings and open Device Maintenance.

Step 2. Open Battery and select Battery Usage.

Step 3. At the top right, you will see three dots. Tap on it, and select Optimized Apps.

Step 4. Now a list of apps will open up. Find Google app in the list and tap on it to turn off battery optimization for it.

7. Exclude Google App from Background Restricted Apps

The last reason behind Ok Google not working properly is the Power Saving Mode. This is another app which restricts apps to save power. You will have to remove Google app from Power Saving Mode’s list. Follow the following steps to perform this.

Step 1. Go to Settings and open Device Maintenance.

Step 2. Tap the Battery icon and open Unmonitored Apps.

Step 3. Tap Edit and select Google app from the list. 

Follow these methods from the first one, and go through each one of them until OK Google starts working on your Galaxy S8 / S8 Plus.

> Read NextHow To Unlock Pattern Lock On Android Phone (3 Ways)

Conclusion

Google’s Ok Google is a wonderful AI, and is a must use application for every Android phone user. It makes you touch your phone less, and perform almost every action on your smartphone using just your voice. We hope these solutions fixed your problems. If Ok Google still not working on your Galaxy S8 or S8+, share the error details on comment section below.

source/ mobipicker.com

[td_block_11 category_id=”3″ limit=”1″ td_filter_default_txt=”” tdc_css=””][td_block_ad_box spot_id=”custom_ad_3″ separator=””]
Make Money Online

How to Rank on Google and Make Money Online

So how do you rank on Google and  actually make money online?  This post is for the people who are struggling with ranking on Google and making affiliate sales.  For example, if you’re trying to promote Amazon products, Clickbank products or any other type of affiliate products, this post is for you.

[td_block_ad_box spot_id=”custom_ad_2″ tdc_css=””]

Just in case you don’t know who I am, my name is Zukais and I’m an SEO expert. I have been ranking websites for years on Google and make a full time income from it.

Let’s  dive straight in…

First of all, you need to create your article.  This is very straightforward.  All you’re doing here, is writing the benefits of the product you are promoting.  Just write what’s good about the product and why people should buy it.  Also,  I would recommend throwing in some negative comments,  just so the review looks more authentic.

After you’ve written the product copy, you want to optimise the post for user experience.  What I’m talking about here is including multimedia such as images, videos, and infographics.  Also,  make sure your text is broken up, no one wants a big wall of text. If that happens, lots of people are going to bounce off your article and this will tank your Google rankings.

Another way you can optimise for user experience is speed. The way to do this is to make sure your image files are small. You can use something like online image compressor to accomplish this. Also, you can even take it a step further and upgrade your hosting. I would recommend SeekaHost, they’re cheap and have fast and reliable hosting.

So now that you’ve created your product review and optimised it for user experience, you want to do the on page SEO. On page SEO is simply optimising the on page elements for the search engines.

Here’s how you do the on page SEO:

– Have your target keyword  in the Google title

– Have  your target keyword as a H1  title

– Have your target keyword  as a H2  title

– Make sure your target keyword appears in the first hundred words of the article

– Make sure your target keyword appears in the middle of the article

– Make sure  your target keyword appears at the bottom of the article

– Have one image that has to target keyword in the alt text

– Have your target keyword as the URL

 So that’s how you do the on page SEO

Now it’s time to build backlinks to your article

So at this point, you’ve created the product copy,  optimised the article,  user experience,  and did the on-page SEO.

There are a few types of links you’re going to want to build first in order to diversify the link profile.

 Here’s a list of them:

  • Forum backlinks
  • Blog comments
  • Social media shares (although these are not technically backlinks)

So these links won’t push your rankings but they will get you some traffic which will help justify the backlinks you do get.

 These are the backlinks you need to build in order to actually push your Google rankings:

  • Guest posts
  • Web 2.0s

Guest posting is simply reaching out to other bloggers and publishing on their site with a backlink to your site or the page you want to rank. I would avoid email outreach and join blogging Facebook groups for this.

Web 2.0s are simply mini blogs such as .Wordpress.com, .Weebly.com, .Wix.com etc. These mini blogs will have an article that links to your site and this will help push your rankings.

And that’s how you rank your affiliate pages on Google. For more make money online stuff, I would recommend checking out ClickDo’s make money online article: Learn More

neOadviser

[td_block_11 category_id=”3″ limit=”1″ td_filter_default_txt=”” tdc_css=””][td_block_ad_box spot_id=”custom_ad_3″ tdc_css=””]
How To Fix https://thevideo.me/pair & vidup.me/pair Error On Kodi

How To Fix https://thevideo.me/pair & vidup.me/pair Error On Kodi (3 Ways)

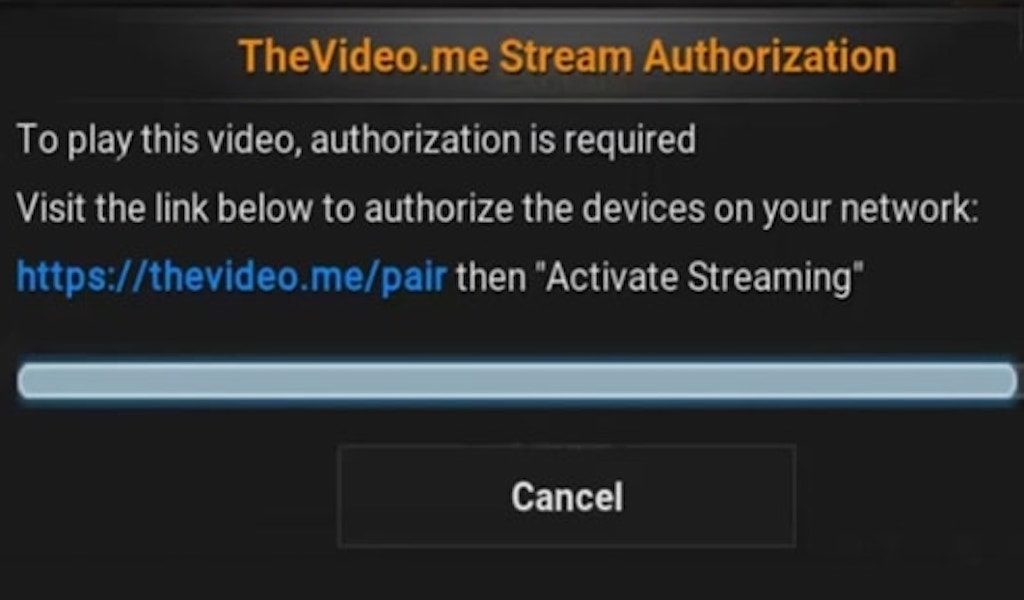
Sometime, while watching your favorite content on Kodi,you may show thevideo.me/pair stream authorization error or vidup.me/pair stream authorization.I know this is the worst thing, but here i will share the top 3 ways to fix https://thevideo.me/pair and https://vidup.me/pair stream authorization error.

[td_block_ad_box spot_id=”custom_ad_2″]

How To Fix https://thevideo.me/pair & vidup.me/pair Error On Kodi (3 Ways)

https://thevideo.me/pair & vidup.me/pair are both some of the biggest servers with thousand of video content.With the help of some video addons like Exodus, Thevideo.me and Vidup.me are being used to watch movies and TV Shows Online.When starting watching content on Kodi and you choose vidup me pair or vidup.me, after that you will receive a message about stream authorization.

However,vidup me pair or https vidup me pair hosting server ask users to select any method to the movies and TV Shows.Below, in this post, we will share 3 ways to fix https://thevideo.me/pair & vidup.me/pair Error On Kodi.

Fix vidup me pair Stream Authorization Error on Kodi

> RelatedFIX openload.co/pair or olpair.com Kodi Error

Method #1: http //vidup.me/pair activate streaming

Step #1: Activate VPN by using VPN service like Express VPN on your Kodi device because it provides fastest and buffer-free streaming experience along with highly encrypted security system. So, open VPN and choose the location.

Step #2: Next, connect with thevideo.me server, you have to open an HTML5 supported web browser on your device. So, open Firefox, Opera Browser, Safari etc.

Step #3: Type https://vidup.tv/pair or https://viup.me/pair in URL bar.

Step #4: Solve the captcha by clicking on “I’m not a robot” box. Click on Activate Streaming.

Step #5: Once you click activate streaming button, your IP address will be paired with vidup.me and thevideo.me servers for 4 hours.

> RelatedHow to Fix https://vshare.eu/pair Error on Kodi (3 Working Methods)

Method #2: Fix Vidup.me Pair Stream Authorization Error on Kodi 17 Krypton

Step #1: When you open a movie using exodus you will see a message that will take some time to load all the servers.

Step #2: Now you will see the list of all the servers exists on exodus. If you tray to select the VIDUP server then you will face on error comes saying VidUP.me Stream Authorization needed.

Step #3: Now go to https://vidup.me/pair here you will find your IP address, and just click on Activate Streaming.

Step #4: You will get a message saying that your IP has been whitelisted for 4hours.

Step #5: Now you just need to go back to the kodi exodus and stream the movie using VIDUPserver. You will see the problem fixed.

> RelatedComplete Guide To Install Kodi on PS4 and PS3 (Working 2018)

Method #3: Turn off Hosters with Captchas

Step #1: First, Go to Addon> Video Add-ons.

Step #2: Right Click on Exodus addon and select Settings.

Step #3: Here you go to Playback from the left column.

Step #4: You will see that Hosters with Captchas option is turned on, just turn it off and then click on OK.

> RelatedSteps to Install Kodi 17.1 Ares Wizard, and Get Pin using http://bit.ly/build_pin

Following the article shared above for sure you will get rid of the problem of https://thevideo.me/pair & vidup.me/pair error issue.Hope you find this article useful.If you have any question, please let us know in the comment section below,follow us on twitter and facebook for more news and updates.

neOadviser – HOW TO

[td_block_11 category_id=”3″ limit=”1″ td_filter_default_txt=”” tdc_css=””][td_block_ad_box spot_id=”custom_ad_3″ tdc_css=””]
WordPress

Why your WordPress site is slow and how you can fix it

Page load speed affects the performance of your WordPress site, which could harm your relationship with potential clients. It is important to keep your speeds up, helping to reduce any likelihood of lost users and deflected traffic.

What causes WordPress sites to be slow?

WordPress sites

There are five primary causes for a slow response time on your WordPress site. When your web hosting server is not correctly configured or is inappropriately located, your site may load slower than it should.

Your WordPress may have a large number of images that are not optimized for web display, and may be too large. This can be as a result of uploading pictured directly from your downloads, desktop or mobile.

Unsuitable plugins can reduce the effectiveness of your website by adding on code that is unnecessary. Plugins with overlapping functions and those that are not updated may also affect the performance of your site.

Your WordPress configuration may hinder efficient page loading. Sites that do not serve cached pages may overload the server and crash or lag.

If not limited, external scripts such as font loaders and ads will affect the way that your page loads. External scripts will increase the size of your page, which could impact its ability to load.

What can be done to improve the speed?

improve the speed

These tips will help optimize the performance of your WordPress site.

Install a WordPress Caching Plugin

WordPress pages are created in a dynamic sense, meaning that the pages are loaded every time someone visits a post or page on your website. To build your pages, WordPress has to run a process to find the required information, put it all together, and then display it to your user. This process involves a lot of steps, and can slow down your website when you have multiple people visiting your site at once. When a user visits your WordPress site, which is built using PHP, your server retrieves information from a MySQL database and your PHP files, and then it’s all put together into a HTML content which is served to the user. It’s a long process, but you can skip a big part of it through the use of Caching plugins.

You can improve the speed of your WordPress site through the use of a caching plugin. Caching can make your WordPress site anywhere from two to five times faster, thus reducing your average load time. Instead of going through the whole page generation process every time, your caching plugin makes a copy of the page after the first load and then presents the cahed page to every other user.

Use Excerpts on archives and for your home page

WordPress displays the full content of each article on your homepage and archives. This means your homepage, categories, tags, and other archive pages will all load slower. If your site has large traffic, the slow response time may be delayed even further, which could significantly affect your performance.

Excerpts show only part of the article, as well as other content available on the website. This can be beneficial because it displays more content, and helps to generate more traffic when users click on the specific article as well as visiting your home page. When fully displayed, users don’t feel the need to visit the actual article, which can reduce page views, and the time your users spend on your site. Showing excerpts will reduce the amount of content displayed, which will help reduce the load time. It will also improve your analytical data.

Optimize your images

Optimize your images

Researchers have found that using colored visuals makes people 80% more likely to read your content. If your images aren’t optimized, they could be hurting more than helping. Non-optimized images are one of the most common speed issues and may affect the relay speed of your WordPress site.

When choosing the pictorials and visuals for your site, you should not upload them directly from your computer or mobile phone. Instead, you need to run them through available optimization software to make them better suited for your site. Compression can reduce the size of an image by up to 10 times, making it better suited for your site while still presenting the aesthetic appeal.

The image format can also play a part in optimization. For simple or transparent pictures, symbols and logos, a PNG format will be the best for use. For detailed and colored pictures, JPG formatted pictures will be suitable for your website.

Update your WordPress site always

WordPress is updated frequently because it is an open source project. Each update will offer new features, as well as fix security issues and bugs. Your WordPress theme and plugins may have regular updates too.

Even though the notifications may be persistent and irritating, it is advisable to follow through with every necessary update. This will protect you from any potential vulnerabilities, which could put your clients and your business at harm. Your site could also become slow and unresponsive as a result of outdated themes, plugins and the core WordPress version.

Do not upload any videos

You can upload videos to your WordPress site, but you are not advised to do so. Your site will consume a lot of bandwidth, which may result in increased fees by your hosting company. Videos will also increase the size of a page, by up to 100 times more than images could. You will also have trouble restoring your WordPress through a backup if you upload videos. You should instead embed links to video hosting services such as YouTube and Vimeo.

Final thought

These tips will help you address slow response times on your WordPress site. To find out whether you may have a problem, you should consider carrying out regular testing. Even though taking up these practices could help reduce your load time, you may need to consider hiring out some of the technical WordPress speed optimization services to professional service providers for regular maintenance and top-notch optimization.

Guide to VPN

A Complete Guide to VPN- Facts, Types, Protocols, and Safety

Most people ask ‘why I should use a VPN, what it is and how it helps’? Well, VPN or Virtual Private Network is a form of network that has been carefully designed to offer a secure conduit when it comes to data transmission amid a web browser and a web server. This tunnel is secure owing to the encryption levels thereof. In today’s age, VPNs have turned into a mandate exclusively for their efficiency and practicality.

How can a Suitable VPN Help?

If you have a VPN that is suitable, you can enjoy the following,

  • Privacy- VPN will enable you to stay anonymous when you are online. Be rest assured that neither the government nor your ISP can see your activities online.
  • Censorship- Most institutions like the workplace, schools, the government, and your ISP as well can censor any activity that you perform online. With a good VPN, you will be capable of evading all that along with possessing the freedom that you want no matter the network type.
  • Geo Spoofing- Often users are denied some online services online based on the geographical location. A VPN will be an ideal means of overcoming such restrictions because it will mask your location providing you with the access that you require.
  • Prevent Hackers- We time and again hear not to use our devices on a public wi-fi hotspot. That is because it will make you fall prey to malicious people and hackers whose intention is in stealing your data. An ideal VPN can solve this issue via offering you with the right encryption for staying safe from such hackers.
  • Downloading- If you love to download files online be it software, movie or songs, having a secure connection is a must because this will help in preventing an attack and keeping all your identity anonymous. To learn more visit FastestVPNGuide.com

Broad Categorization

To have a proper understanding of a VPN, it is essential to be familiar with the different forms of VPNs available. VPNs are of two broad categories – Site-to-Site VPN and Remote Access VPN.

  • Site-to-Site VPN- The site-to-site or router-to-router VPN is extremely popular with corporates. Mostly, businesses which have offices in different geographical locations use this. The VPN acts as a safe virtual bridge. Here the geographically distant workstations’ networks are joined for maintaining secure communications.
  • Remote Access VPN- The VPN is for connecting to private networks. One can use its resources from a remote location with its connection through the public internet yet is secure and private. The remote access VPN is equally beneficial for business and home users alike. If you are an employee who wishes to work while traveling, you will require a VPN for accessing the vital resources or files you need from the organization’s private network. On the other hand, this VPN for a home userwill prove handy for bypassing the restrictions like blocked sites.

The Powerful VPN Protocols

The VPN security protocols are available in various types which offer security features of varying levels. Take a look,

  • IPsec or the Internet Protocol Security- Through this protocol one can have secure online security communication all over an IP network. It will secure the communication via authenticating as well as encrypting every data packet at the time of the connection. IPsec functions in two modes namely tunneling and transport. The former will encrypt the whole data packet, and the latter will handle the message encryption within the data packet. This VPN protocol is also used together with different other security protocols for enhancing the security system.
  • PPTP or Point-to-Point Tunnelling- This protocol helps in creating a tunnel as well as encapsulate the data packet. The point-to-point tunneling will pave the way for multiprotocol traffic encryption and encapsulate within the IP header for being sent across online. The primary use is for site-to-site and remote access connections.
  • L2TP or Layer 2 Tunnelling Protocol- This protocol will merge with other security protocols like IPsec for attaining a highly secure VPN connection. It is accountable to create a tunnel amid 2 L2TP connection points, and the IPsec protocol will take care of the data encryption and the secure communications amid the tunnels.
  • SSL or Secure Socket Layer and TLS or Transport Layer Security-Both online shopping sites and online service providers use these protocols commonly. They will help in creating a VPN connection that will help the web browser is acting as a client thereby restricting the access to the user to specific applications and not to the network in its entirety. A web browser has the flexibility of swiftly switching to the SSL because it comes integrated with TLS and SSL. The former can be identified easily through https at the URL’s beginning rather than HTTP.
  • SSH or Secure Shell- It will help in creating the VPN tunnel into which the transfer of data will take place and at the same time ensure the tunnel’s encryption. The SSH clients will make SSH connections while the data will be routed towards the remote server from the local port through the encrypted tunnel. This protocol is ideal to offer an encrypted channel for allowing the logging into a different PC over a network along with shifting files from a particular PC to another. It will provide secure authentication and encrypted communication.
  • OpenVPN- This protocol is flexible software that is open source and a tunneling application that uses TLS/SSL for crucial exchange along with being capable of traversing NATs (Network address translators) and firewalls. The Open VPN will make sure connections of point-to-point are in routed configurations. It is both stable and also reliable on unreliable networks and Wi-Fi hotspots. That will offer high speed on connections that have latency that is excessively high.
  • SSTP or Secure Socket Tunnelling Protocol- This VPN tunnel will allow in the PPT traffic’s transportation through a TLS/SSL channel. It is mostly used in case of remote client access and supports user authentication.

Using a VPN service is safe and legal and will ensure that every person’s online activities remain private. After learning about the significance of using a VPN choosing it right also matters. After all, it is critical when it comes to your anonymity and online security. Some pointers that you need to consider here include- the protocols it uses, the number of servers as well as server locations that it offers, will it log the activities that you do online, its spyware/anti-malware capabilities, contains mobile apps, the pricing, internet speed, and customer support.

neoadviser

[td_block_11 category_id=”3″ limit=”1″ td_filter_default_txt=””][td_block_ad_box spot_id=”custom_ad_3″]